Translate

Friday, January 31, 2014

Focke Wulf FW 190 A-5

Here are some images of Hasegawas 1/32 scale Focke Wulf FW 190 A-5. Old tooling.

From Wikipedia"
The Fw 190 A-5 was developed after it was determined that the Fw 190 could easily carry more ordnance. The D-2 engine was moved forward another 15 cm (6 in) as had been tried out earlier on the service test A-3/U1 aircraft, moving the centre of gravity forward to allow more weight to be carried aft. Some A-5s were tested with the MW 50 installation: this was a mix of 50% methyl alcohol and 50% water, which could be injected into the engine to produce a short-term power boost to 2,000 PS (1,973 hp, 1,471 kW), but this system was not adopted for serial production. New radio gear, including FuG 25a Erstling IFF, and an electric artificial horizon found their way into the A-5. The A-5 retained the same basic armament as the A-4.
The A-5 too, saw several Umrüst-Bausätze kits. The U2 was designed as a night Jabo-Rei and featured anti-reflective fittings and exhaust flame dampeners. A centre-line ETC 501 rack typically held a 250 kg (550 lb) bomb, and wing-mounted racks mounted 300 L drop tanks. A EK16 gun camera, as well as landing lights, were fitted to the wing leading edge. The U2 was armed with only two 20 mm MG 151 cannon. The U3 was a Jabo fighter fitted with ETC 501s for drop tanks and bombs; it too featured only two MG 151s for armament. The U4 was a "recon" fighter with two RB 12.5 cameras and all armament of the basic A-5 with the exception of the MG FF cannon. The A-5/U8 was another Jabo-Rei outfitted with SC-250 centreline-mounted bombs, under-wing 300-litre drop tanks and only two MG 151s; it later became the Fw 190 G-2. A special U12 was created for bomber attack, outfitted with the standard 7.92 mm (.312 in) MG 17 and 20 mm MG 151 but replacing the outer wing 20 mm MG-FF cannon with two underwing gun pods containing two 20 mm MG 151/20 each, for a total of two machine guns and six cannon. The A-5/U12 was the prototype installation of what was known as the R1 package from the A-6 onwards. The A-5/R11 was a night fighter conversion fitted with FuG 217 Neptun (Neptune) radar equipment with arrays of three dipole antenna elements vertically mounted fore and aft of the cockpit and above and below the wings. Flame-dampening boxes were fitted over the exhaust exits. 1,752 A-5s were built from November 1942 to June 1943.

Ironman One From Marooned

Here are some more images of my kit bash Ironman One from the 1969 movie Marooned.
Built from Dragon Models 1/48 scale Apollo 11 Command/Service Module.
I couldn't swear to its accuracy as there doesn't seem to be very much information on it.
Still I think it gives a reasonable facsimile.

From Wikipedia"
Marooned is a 1969 American film directed by John Sturges and starring Gregory Peck, Richard Crenna, David Janssen, James Franciscus, and Gene Hackman.
The film was released less than four months after the Apollo 11 moon landing and was tied to the public fascination with the event. It won an Academy Award for Visual Effects.
It was based on the 1964 novel of the same name by Martin Caidin; however, while the original novel was based on the single-pilot Mercury program, the film depicted an Apollo Command/Service Module with three astronauts and a space station resembling Skylab. Caidin acted as technical adviser and updated the novel, incorporating appropriate material from the original version.

Three American astronauts—commander Jim Pruett (Crenna), "Buzz" Lloyd (Hackman), and Clayton "Stoney" Stone (Franciscus)—are the first crew of an experimental space station. While returning to Earth, the main engine on the Apollo spacecraft Ironman One fails. Mission Control determines that Ironman does not have enough backup thruster capability to initiate atmospheric reentry, or to re-dock with the station and wait for rescue. The crew is marooned in orbit.
NASA debates whether a rescue flight can reach the crew before their oxygen runs out in approximately two days. There are no backup launch vehicles or rescue systems available at Kennedy Space Center and NASA director Charles Keith (Peck) opposes using an experimental Air Force X-RV lifting body that would be launched on a Titan IIIC booster; neither the spacecraft nor the booster is man-rated, and there is insufficient time to put a new manned NASA mission together. Even though a booster is already on the way to nearby Cape Canaveral Air Force Station for an already-scheduled Air Force launch, many hundreds of hours of preparation, assembly, and testing would be necessary.
Ted Dougherty (Janssen), the Chief Astronaut, opposes Keith and demands that something be done. The President agrees with Dougherty and tells Keith that failing to try a rescue mission will kill public support for the manned space program. The President tells Keith that money is no factor; "whatever you need, you've got it".
While the astronauts' wives (Lee Grant, Mariette Hartley, and Nancy Kovack) agonize over the fates of their husbands, all normal checklist procedures are bypassed to prepare the X-RV for launch. A hurricane headed for the launch area threatens to cancel the mission. However, the eye of the storm passes over the Cape at the last minute during a launch window, permitting a launch with Dougherty aboard.
There is insufficient oxygen left for all three astronauts to survive until Dougherty arrives. There is possibly enough for two. Pruett and his crew then debate what to do. Stone tries to reason that they can somehow survive. Lloyd offers to leave since he is "using up most of the oxygen anyway", but Pruett overrides him. He orders everyone into their spacesuits then leaves the ship, ostensibly to attempt repairs. When Lloyd realizes what Pruett is really intending, he attempts to go after him. Before he can reach Pruett, the latter sacrifices himself by tearing open his space suit, and his body drifts away into space. With Pruett gone, Stone takes command.
A Soviet spacecraft suddenly appears and its cosmonaut tries to make contact. It can do nothing but deliver oxygen since the Soviet ship is too small to carry additional passengers. Stone and Lloyd, suffering oxygen deprivation, cannot understand the cosmonaut's gestures or obey Keith's orders.
Dougherty arrives and he and the cosmonaut transfer the two surviving and mentally dazed Ironman astronauts into the rescue ship. Both the Soviet ship and the X-RV return to Earth, and the final scene fades out with a view of the abandoned Ironman One adrift in orbit.

Thursday, January 30, 2014

1926 Mack (Bulldog) Tank Truck

Here are some more images of Monogram's 1/24 scale 1926 Mack (Bulldog) Tank Truck
Perhaps the most well known name in the annals of trucking history is the Mack model AC - or "Bulldog", as it became known by the soldiers of World War 1. Production of the famous Bulldog, with its characteristic hood shape, was started in 1915 and continued through to 1935. It served proudly ans well in every conceivable function where a truck could be used. The term "Built like a Mack Truck" became a popular phrase to describe anything solid and dependable.
Try as I might, I could not find any information on the "Gargle Oil Company" other than the Monogram model and some model railroad reference.
If anyone has any information on this company I'd like to hear about it.
Personally I'm beginning to doubt it had even existed.


Tuesday, January 28, 2014

Junkers JU87 B2 (Stuka)


Here are some images of MPC (Airfix Molds) 1/24 scale Junkers JU87 B2 (Stuka) dive Bomber.

From Wikipedia'
The Junkers Ju 87 or Stuka (from Sturzkampfflugzeug, "dive bomber") was a two-man (pilot and rear gunner) German dive bomber and ground-attack aircraft. Designed by Hermann Pohlmann, the Stuka first flew in 1935 and made its combat debut in 1936 as part of the Luftwaffe's Condor Legion during the Spanish Civil War.
The aircraft was easily recognisable by its inverted gull wings and fixed spatted undercarriage, upon the leading edges of its faired maingear legs were mounted the Jericho-Trompete ("Jericho Trumpet") wailing sirens, becoming the propaganda symbol of German air power and the blitzkrieg victories of 1939–1942. The Stuka's design included several innovative features, including automatic pull-up dive brakes under both wings to ensure that the aircraft recovered from its attack dive even if the pilot blacked out from the high acceleration.
Although sturdy, accurate, and very effective against ground targets, the Ju 87, like many other dive bombers of the war, was vulnerable to modern fighter aircraft. Its flaws became apparent during the Battle of Britain; poor manoeuvrability and a lack of both speed and defensive armament meant that the Stuka required heavy fighter escort to operate effectively.
The Stuka operated with further success after the Battle of Britain, and its potency as a precision ground-attack aircraft became valuable to German forces in the Balkans Campaign, the African and Mediterranean theaters and the early stages of the Eastern Front campaigns where Soviet fighter resistance was disorganised and in short supply.
Once the Luftwaffe had lost air superiority on all fronts, the Ju 87 once again became an easy target for enemy fighter aircraft. In spite of this, because there was no better replacement, the type continued to be produced until 1944. By the end of the conflict, the Stuka had been largely replaced by ground-attack versions of the Focke-Wulf Fw 190, but was still in use until the last days of the war. An estimated 6,500 Ju 87s of all versions were built between 1936 and August 1944.
Some notable airmen flew the Ju 87. Oberst Hans-Ulrich Rudel was the most successful Stuka ace and the most highly decorated German serviceman of the Second World War. The vast majority of German ground attack aces flew this aircraft at some point in their careers.


The Ju 87 B series was to be the first mass-produced variant. A total of six pre-production Ju 87 B-0 were produced, built from Ju 87 A airframes. Test flights began from the summer of 1937. A small number, at least three, served as conversion Cs or Es for potential naval variants.
The first production version was the Ju 87 B-1, with a considerably larger engine, its Junkers Jumo 211D generating 1,200 PS (883 kW, 1,184 hp), and completely redesigned fuselage and landing gear. This new design was again tested in Spain, and after proving its abilities there, production was ramped up to 60 per month. As a result, by the outbreak of World War II, the Luftwaffe had 336 Ju 87 B-1s on hand. The B-1 was also fitted with "Jericho trumpets", essentially propeller-driven sirens with a diameter of 0.7 m (2.3 ft) mounted on the wing's leading edge directly forward of the landing gear, or on the front edge of the fixed main gear fairing. This was used to weaken enemy morale and enhance the intimidation of dive-bombing. After the enemy became used to it, however, they were withdrawn. The devices caused a loss of some 20–25 km/h (10-20 mph) through drag. Instead, some bombs were fitted with whistles on the fin to produce the noise after release.
The trumpets were a suggestion from Generaloberst Ernst Udet (but some authors say the idea originated from Adolf Hitler). The Ju 87 B-2s that followed had some improvements and were built in a number of variants that included ski-equipped versions (the B-1 also had this modification[), and at the other end, with a tropical operation kit called the Ju 87 B-2 trop. Italy's Regia Aeronautica received a number of the B-2s and named them the "Picchiatello", while others went to the other members of the Axis, including Hungary, Bulgaria and Romania. The B-2 also had an oil hydraulic system for closing the cowling flaps. This continued in all the later designs.
The tropicalised versions were initially named the Ju 87 B-2/U1. This was eventually designated the Ju 87 B-2 trop, equipped with tropical emergency equipment and sand filters for the powerplant.
Production of the Ju 87 B started in 1937. 89 B-1s were to be built at Junkers' factory in Dessau and another 40 at the Weserflug plant in Lemwerder by July 1937. Production would be carried out by the Weserflug company after April 1938, but Junkers continued producing Ju 87 up until March 1940. Total production amounted to 697 B-1s (311 by Junkers, 386 by Weserflug) and 225 B-2s (56 by Junkers, 169 by Weserflug). The last Ju 87B rolled off the production lines in October 1940.

Monday, January 27, 2014

H.M.A.V. Bounty

Here are some more images of Artesania Latina's 1/48 scale HMAV Bounty.  It is interesting to note, but as far as ship commanders went Lt. William Bligh was actually one of the better ones regardless as to how Hollywood has made him out to be. He was generally good to his men and he had an extreme reluctance to physically punishing his men when it was warranted instead preferring a verbal assault something Bligh was extremely adept at and at times got him into trouble. Now Captain George Vancouver there was a sadistic S.O.B sometimes flogging his men so hard they sometimes died. Why they named a city after him I'll never know, not exactly the nicest of chaps. Perhaps not enough research was done on him before naming the city, but I digress. If you want to see the movie I think has the closest representation and accuracy as to what really happened with The Bounty I'd suggest checking out The Bounty (1984) starring Anthony Hopkins and Mel Gibson but remember although a good movie take it with a grain of sea salt.


From Wikipedia"
HMS Bounty (known to historians as HM Armed Vessel Bounty, popularly as HMAV Bounty, and to many simply as "The Bounty"), famous as the scene of the Mutiny on the Bounty on 28 April 1789, was originally a three-masted cargo ship, the Bethia, purchased by the British Admiralty, then modified and commissioned as His Majesty's Armed Vessel the Bounty for a botanical mission to the Pacific Ocean.
Bounty began her career as the collier Bethia, built in 1784 at the Blaydes shipyard in Hull. Later she was purchased by the Royal Navy for £2,600 (roughly £260 thousand / 474 thousand / $613 thousand in modern currency) on 26 May 1787 (JJ Colledge/D Lyon say 23 May), refit, and renamed Bounty. She was a relatively small sailing ship at 215 tons, three-masted and full-rigged. After conversion for the breadfruit expedition, she mounted only four 4-pounders (2 kg cannon) and ten swivel guns. Thus she was very small in comparison to other three-mast colliers used for similar expeditions: Cook's Endeavour displaced 368 tons and Resolution 462 tons.
Some 1,300 miles (2,100 km) west of Tahiti, near Tonga, mutiny broke out on 28 April 1789. Despite strong words and threats heard on both sides, the ship was taken bloodlessly and apparently without struggle by any of the loyalists except Bligh himself. Of the 42 men on board aside from Bligh and Christian, 18 joined Christian in mutiny, two were passive, and 22 remained loyal to Bligh. The mutineers ordered Bligh, the ship's master, two midshipmen, the surgeon's mate (Ledward), and the ship's clerk into Bounty's launch. Several more men voluntarily joined Bligh rather than remaining aboard. Bligh and the others in the launch sailed 30 nautical miles (56 km) to Tofua in search of supplies, but were forced to flee after attacks by hostile natives resulted in the death of one of the men. Bligh then undertook an arduous journey to the Dutch port of Coupang, located over 3,500 nautical miles (6,500 km) from Tofua. He safely landed there 47 days later, having lost no men during the voyage except the one killed on Tofua.
The mutineers sailed for the island of Tubuai, where they tried to settle. After three months of being terrorized by the cannibalistic natives, however, they returned to Tahiti. Sixteen of the mutineers and the four loyalists who had been unable to accompany Bligh remained there, taking their chances that the Royal Navy would find them and bring them to justice.
Immediately after setting the sixteen men ashore in Tahiti in September 1789, Fletcher Christian, eight other crewmen, six Tahitian men, and 11 women, one with a baby, set sail in Bounty hoping to elude the Royal Navy. According to a journal kept by one of Christian's followers, the Tahitians were actually kidnapped when Christian set sail without warning them, the purpose of this being to acquire the women.
The mutineers passed through the Fiji and Cook Islands, but feared that they would be found there. Continuing their quest for a safe haven, on 15 January 1790 they rediscovered Pitcairn Island, which had been misplaced on the Royal Navy's charts. After the decision was made to settle on Pitcairn, livestock and other provisions were removed from the Bounty. To prevent the ship's detection, and anyone's possible escape, the ship was burned on 23 January 1790 in what is now called Bounty Bay.
Thirty-five years later in 1825, HMS Blossom on a voyage of exploration under Captain Frederick Beechey, arrived on Christmas Day off Pitcairn and spent 19 days there. Captain Beechey later recorded this in his 1831 published account of the voyage, as did one of his crew, John Bechervaise, in his 1839 Thirty-Six years of a Seafaring Life by an Old Quarter Master. Beechey prints a detailed account of the mutiny as recounted to him by the last survivor, Adams. Bechervaise, who gives a detailed account of the life of the islanders, says he found the remains of Bounty and took some pieces of wood from it which were turned into souvenirs such as snuff boxes.
(Beechey's account is rare; there is a copy in the Caird Library in Greenwich. Original copies of John Bechervaise's privately printed book are also rare but has been reprinted in facsimile by Kessinger).
Luis Marden discovered the remains of the Bounty in January 1957. After spotting remains of the rudder,(which had been found in 1933 by Parkin Christian, and is still displayed in the Fiji Museum in Suva), he persuaded his editors and writers to let him dive off Pitcairn Island, where the rudder had been found. Despite the warnings of one islander – "Man, you gwen be dead as a hatchet!" – Marden dived for several days in the dangerous swells near the island, and found the remains of the fabled ship: a rudder pin, nails, a ships boat oarlock, fittings and a Bounty anchor which he raised. He subsequently met with Marlon Brando to counsel him on his role as Fletcher Christian in the 1962 film Mutiny on the Bounty. Later in life, Marden wore cuff links made of nails from the Bounty. Marden also dived on the wreck of HMS Pandora and left a Bounty nail with the Pandora.
Some of her remains, such as her ballast stones, are still partially visible in the waters of Bounty Bay.
The last of the Bounty's 4-pounders was recovered in 1998 by an archaeological team from James Cook University and was sent to the Queensland Museum in Townsville to be stabilised through lengthy conservation treatment, i.e. nearly 40 months of electrolysis. The gun was subsequently returned to Pitcairn Island where it has been placed on display in a new community hall.

Sunday, January 26, 2014

H.M.S. Endeavour

Here are some images of Constructo's 1/60 scale H.M.S. Endeavour.

From Wikipedia"

HMS Endeavour, also known as HM Bark Endeavour, was a British Royal Navy research vessel that Lieutenant James Cook commanded on his first voyage of discovery, to Australia and New Zealand from 1769 to 1771.
She was launched in 1764 as the collier Earl of Pembroke, and the Navy purchased her in 1768 for a scientific mission to the Pacific Ocean and to explore the seas for the surmised Terra Australis Incognita or "unknown southern land". The Navy renamed and commissioned her as His Majesty's Bark the Endeavour.
She departed Plymouth in August 1768, rounded Cape Horn, and reached Tahiti in time to observe the 1769 transit of Venus across the Sun. She then set sail into the largely uncharted ocean to the south, stopping at the Pacific islands of Huahine, Borabora, and Raiatea to allow Cook to claim them for Great Britain. In September 1769, she anchored off New Zealand, the first European vessel to reach the islands since Abel Tasman's Heemskerck 127 years earlier.
In April 1770, Endeavour became the first ship to reach the east coast of Australia, when Cook went ashore at what is now known as Botany Bay. Endeavour then sailed north along the Australian coast. She narrowly avoided disaster after running aground on the Great Barrier Reef, and Cook had to throw her guns overboard to lighten her. He then beached her on the mainland for seven weeks to permit rudimentary repairs to her hull. On 10 October 1770, she limped into port in Batavia (now named Jakarta) in the Dutch East Indies for more substantial repairs, her crew sworn to secrecy about the lands they had discovered. She resumed her westward journey on 26 December, rounded the Cape of Good Hope on 13 March 1771, and reached the English port of Dover on 12 July, having been at sea for nearly three years.
Largely forgotten after her epic voyage, Endeavour spent the next three years shipping Navy stores to the Falkland Islands. Renamed and sold into private hands in 1775, she briefly returned to naval service as a troop transport during the American Revolutionary War and was scuttled in a blockade of Narragansett Bay, Rhode Island in 1778. Her wreck has not been precisely located, but relics, including six of her cannons and an anchor, are displayed at maritime museums worldwide. A replica of Endeavour was launched in 1994 and is berthed alongside the Australian National Maritime Museum in Sydney Harbour. The space shuttle Endeavour is named for the original ship.
Endeavour features on the New Zealand fifty cent piece in recognition of its significant place in the nation's history.

Endeavour was originally the merchant collier Earl of Pembroke, launched in June 1764 from the coal and whaling port of Whitby in North Yorkshire, and of a type known locally as the Whitby Cat. She was ship-rigged and sturdily built with a broad, flat bow, a square stern and a long box-like body with a deep hold.
A flat-bottomed design made her well-suited to sailing in shallow waters and allowed her to be beached for loading and unloading of cargo and for basic repairs without requiring a dry dock. Her hull, internal floors and futtocks were built from traditional white oak, her keel and stern post from elm and her masts from pine and fir. Plans of the ship also show a double keelson to lock the keel, floors and frames in place.
Some doubt exists about the height of her masts, as surviving diagrams of Endeavour depict the body of the vessel only, and not the mast plan. While her main and foremasts are accepted to be a standard 129 and 110 feet (39 and 34 m) respectively, an annotation on one surviving ship plan records the mizzen as "16 yards 29 inches" (15.4 m). If correct, this would produce an oddly truncated mast a full 9 feet (2.7 m) shorter than the standards of the day. Modern research suggests the annotation may be a transcription error and should read "19 yards 29 inches" (24.5 m), which would more closely conform with both the naval standards and the lengths of the other masts. The replica is built to this shorter measurement, as is the model in the National Maritime Museum in Greenwich. There is a differences between the height of the mizzen fore-and-aft spar in the contemporary painting by Luny (below) and its position on the replica in the photographs, compared to the height of the lowest spars on the fore and mainmasts.

On 16 February 1768, the Royal Society petitioned King George III to finance a scientific expedition to the Pacific to study and observe the 1769 transit of Venus across the sun. Royal approval was granted for the expedition, and the Admiralty elected to combine the scientific voyage with a confidential mission to search the south Pacific for signs of the postulated continent Terra Australis Incognita (or "unknown southern land").
The Royal Society suggested command be given to Scottish geographer Alexander Dalrymple, whose acceptance was conditional on a brevet commission as a captain in the Royal Navy. However, First Lord of the Admiralty Edward Hawke refused, going so far as to say he would rather cut off his right hand than give command of a Navy vessel to someone not educated as a seaman. In refusing Dalrymple's command, Hawke was influenced by previous insubordination aboard the sloop HMS Paramour in 1698, when naval officers had refused to take orders from civilian commander Dr. Edmond Halley. The impasse was broken when the Admiralty proposed James Cook, a naval officer with a background in mathematics and cartography. Acceptable to both parties, Cook was promoted to Lieutenant and named as commander of the expedition.
A three-masted sailing ship leaves a busy seaport while five men watch from the shore. Green hills flank the seaport, beneath a cloudy sky.
Earl of Pembroke, later HMS Endeavour, leaving Whitby Harbour in 1768. By Thomas Luny, dated 1790.
On 27 May 1768, Cook took command of the Earl of Pembroke, valued in March at £2,307. 5s. 6d. but ultimately purchased for £2,840. 10s. 11d. and assigned for use in the Society's expedition. She was refitted at Deptford on the River Thames for the sum of £2,294, almost the price of the ship itself. The hull was sheathed and caulked to protect against shipworm, and a third internal deck installed to provide cabins, a powder magazine and storerooms. The new cabins provided around 2 square metres (22 sq ft) of floorspace apiece and were allocated to Cook and the Royal Society representatives: naturalist Joseph Banks, Banks' assistants Daniel Solander and Herman Spöring, astronomer Charles Green, and artists Sydney Parkinson and Alexander Buchan. These cabins encircled the officer's mess. The Great Cabin at the rear of the deck was designed as a workroom for Cook and the Royal Society. On the rear lower deck, cabins facing on to the mate's mess were assigned to Lieutenants Zachary Hicks and John Gore, ship's surgeon William Monkhouse, the gunner Stephen Forwood, ship's master Robert Molyneux, and the captain's clerk Richard Orton. The adjoining open mess deck provided sleeping and living quarters for the marines and crew, and additional storage space.
A longboat, pinnace and yawl were provided as ship's boats, though the longboat was rotten and had to be rebuilt and painted with white lead before it could be brought aboard. These were accompanied by two privately owned skiffs, one belonging to the boatswain John Gathrey, and the other to Banks. The ship was also equipped with a set of 28 ft (8.5 m) sweeps to allow her to be rowed forward if becalmed or demasted. The refitted vessel was commissioned as His Majesty's Bark the Endeavour, to distinguish her from the 14-gun sloop HMS Endeavour.
On 21 July 1768, Endeavour sailed to Galleon's Reach to take on armaments to protect her against potentially hostile Pacific island natives. Ten 4-pounder cannons were brought aboard, six of which were mounted on the upper deck and the remainder stowed in the hold. Twelve swivel guns were also supplied, and fixed to posts along the quarterdeck, sides and bow. The ship departed for Plymouth on 30 July, for provisioning and to board her crew of 85, including 12 Royal Marines. Cook also ordered that twelve tons of pig iron be brought on board as sailing ballast.


Friday, January 24, 2014

USS Arizona BB-39

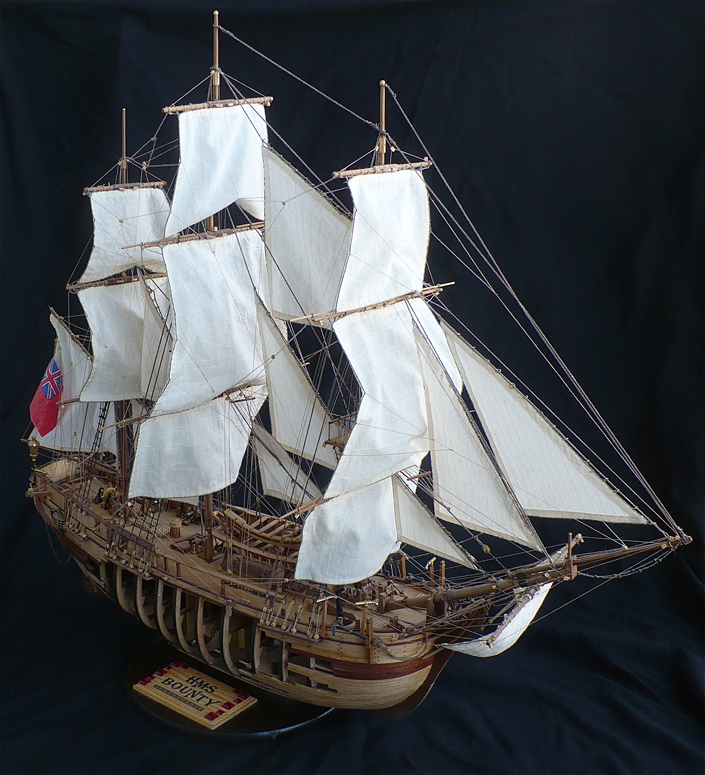
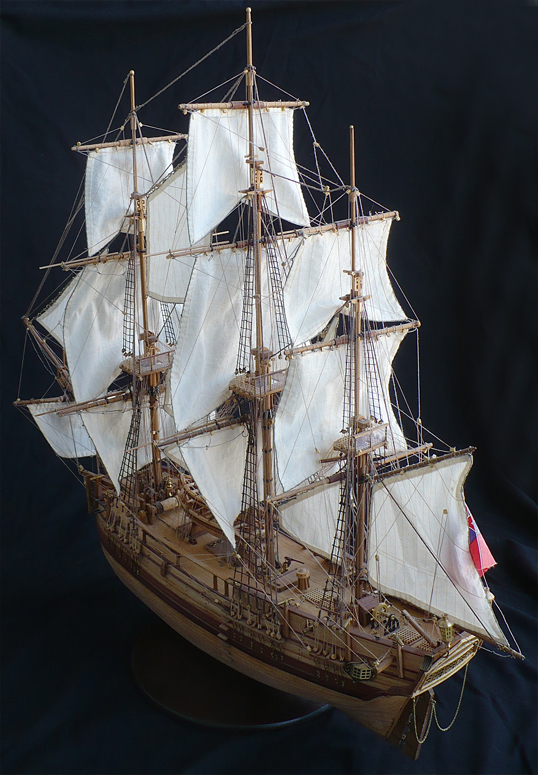
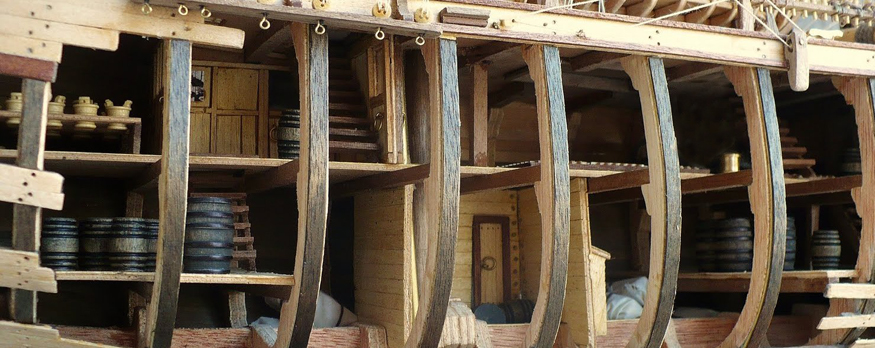
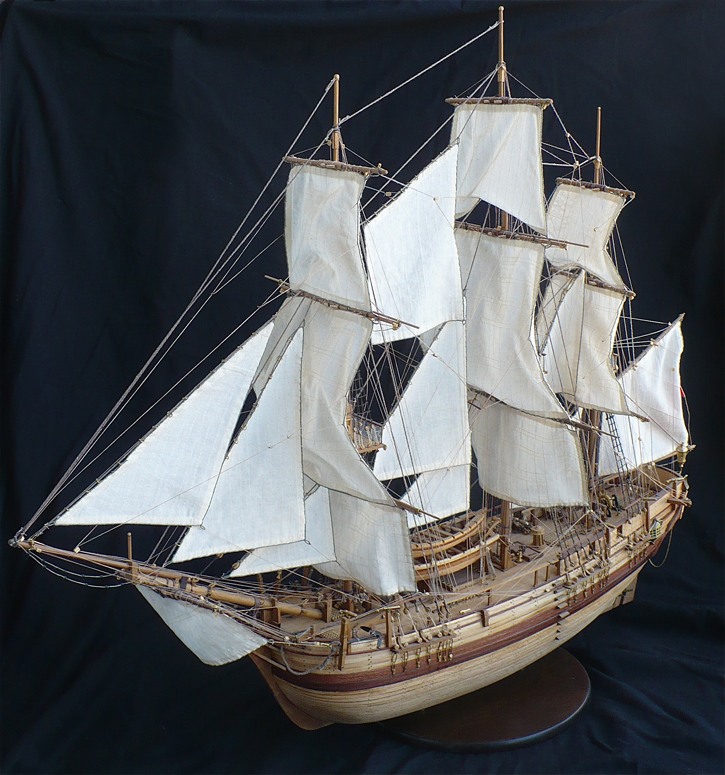
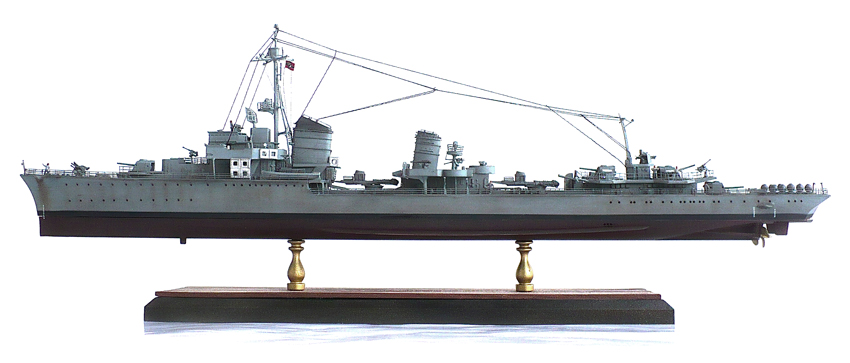
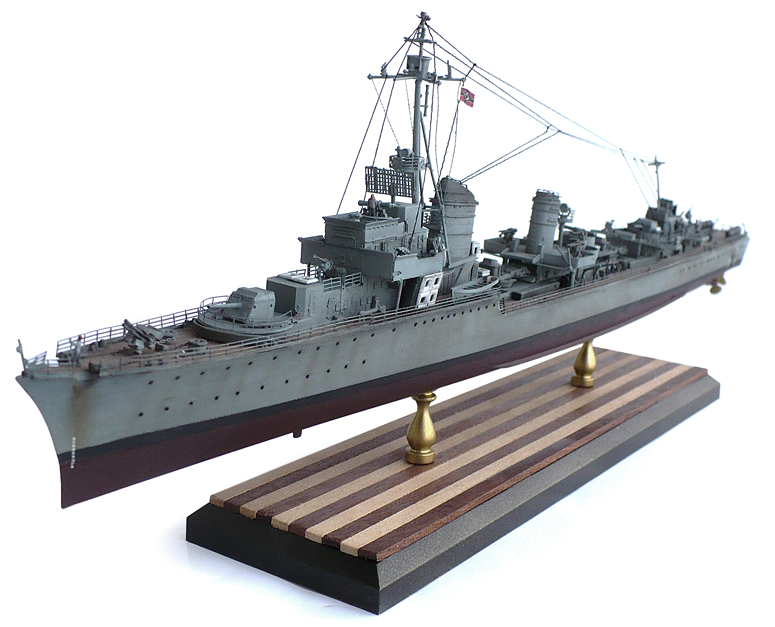
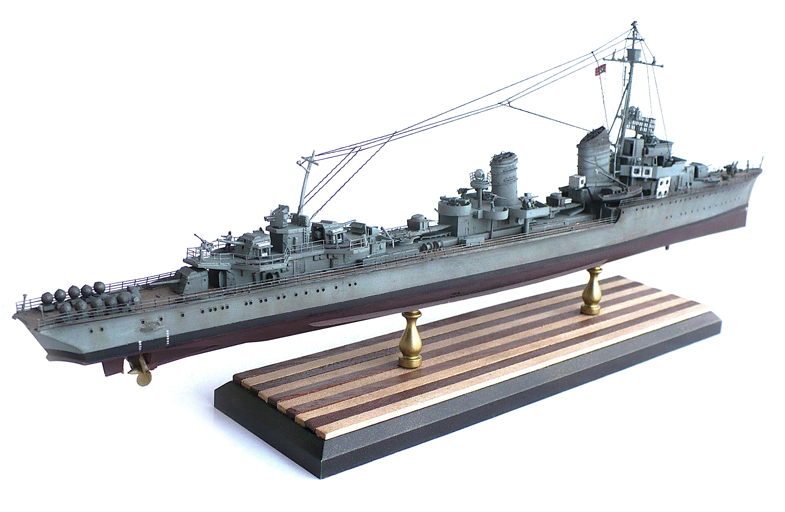
Here are some more images of Trumpeter's 1/200 scale USS Arizona (BB-39) Battleship.
Probably the most detailed and largest Arizona kit you will find. A beautiful model kit.

From Wikipedia"
USS Arizona (BB-39) was a Pennsylvania-class battleship built for the United States Navy and the first to be named "Arizona". On 4 March 1913, Congress authorized the construction of Arizona, named to honor the 48th state's admission into the union on 14 February 1912. The ship was the second and last of the Pennsylvania class of "super-dreadnought" battleships. Her keel was laid at the Brooklyn Navy Yard on 16 March 1914. She was launched on 19 June 1915, sponsored by Esther Ross, the daughter of a prominent Arizona pioneer, W.W. Ross of Prescott, Arizona. The ship's remaining machinery, including new Parsons turbines, was installed, and she was commissioned at her builder's yard on 17 October 1916, with Captain John D. McDonald in command.
Arizona served stateside during World War I. She is mostly remembered because of her sinking, with the loss of 1,177 lives, during the Japanese attack on Pearl Harbor on 7 December 1941, the event that provoked the United States into entering World War II. Unlike most of the other ships sunk or damaged that day, the Arizona could not be salvaged, although the U.S. Navy removed several elements of the ship that were reused.
The wreck still lies at the bottom of Pearl Harbor. The USS Arizona Memorial, dedicated in 1962 to all those who died during the Pearl Harbor attack, was built astraddle the ship's hull. The Arizona retains the right, in perpetuity, to fly the United States flag as if she were an active, commissioned naval vessel.
Arizona was significantly larger than her predecessors of the Nevada class. As completed she had an overall length of 608 feet (185.3 m), a beam of 97 feet (29.6 m) (at the waterline), and a draft of 29 feet 3 inches (8.9 m) at deep load. This was 25 feet (7.6 m) longer than the older ships. She displaced 29,158 long tons (29,626 t) at standard and 31,917 long tons (32,429 t) at deep load, over 4,000 long tons (4,060 t) more than the older ships. The ship had a metacentric height of 7.82 feet (2.4 m) at deep load.
The ship had four Parsons steam turbine sets, each of which drove a propeller 12 feet 1.5 inches (3.7 m) in diameter. They were powered by twelve Babcock & Wilcox water-tube boilers. The turbines were designed to produce a total of 31,500 shaft horsepower (23,500 kW), but only achieved 29,366 shp (21,898 kW) during Arizona's sea trials, when she slightly exceeded her designed speed of 21 knots (39 km/h; 24 mph). She was designed to carry 1,548 long tons (1,573 t) of fuel oil, but had a maximum capacity of 2,305 long tons (2,342 t). At full capacity, the ship could steam at a speed of 12 knots (22 km/h; 14 mph) for an estimated 7,552 nautical miles (13,990 km; 8,690 mi) with a clean bottom. She had four 300-kilowatt (402 hp) turbo generators.
Arizona carried twelve 45-caliber 14-inch guns in triple gun turrets. The turrets were numbered from I to IV from front to rear. The guns could not elevate independently and were limited to a maximum elevation of +15° which gave them a maximum range of 21,000 yards (19,000 m). The ship carried 100 shells for each gun. Defense against torpedo boats was provided by twenty-two 51-caliber five-inch guns mounted in individual casemates in the sides of the ship's hull. They proved to be very wet and could not be worked in heavy seas. At an elevation of 15°, they had a maximum range of 14,050 yards (12,850 m). Each gun was provided with 230 rounds of ammunition. The ship mounted four 50-caliber three-inch guns for anti-aircraft defense, although only two were fitted when completed. The other pair were added shortly afterwards on top of Turret III. Arizona also mounted two 21-inch (533 mm) torpedo tubes and carried 24 torpedoes for them.
The Pennsylvania-class design continued the all or nothing principle of armoring only the only most important areas of the ship begun in the preceding Nevada class. The waterline armor belt of Krupp armour measured 13.5 inches (343 mm) thick and only covered the ship's machinery spaces and magazines. It had a total height of 17 feet 6 inches (5.3 m), of which 8 feet 9.75 inches (2.7 m) was below the waterline; beginning 2 feet 4 inches (0.7 m) below the waterline, the belt tapered to its minimum thickness of 8 inches (203 mm). The transverse bulkheads at each end of the ship ranged from 13 to 8 inches in thickness. The faces of the gun turrets were 18 inches (457 mm) thick while the sides were 9–10 inches (230–250 mm) thick and the turret roofs were protected by 5 inches (127 mm) of armor. The armor of the barbettes was 18 to 4.5 inches (457 to 114 mm) thick. The conning tower was protected by 16 inches (406 mm) of armor and had a roof eight inches thick.
The main armor deck was three plates thick with a total thickness of 3 inches (76 mm); over the steering gear the armor increased to 6.25 inches (159 mm) in two plates. Beneath it was the splinter deck that ranged from 1.5 to 2 inches (38 to 51 mm) in thickness. The boiler uptakes were protected by a conical mantlet that ranged from 9–15 inches (230–380 mm) in thickness. A three-inch torpedo bulkhead was placed 9 feet 6 inches (2.9 m) inboard of the ship's side and the ship was provided with a complete double bottom. Testing in mid-1914 revealed that this system could withstand 300 pounds (140 kg) of TNT.
Shortly before 8:00 am, Japanese aircraft from six aircraft carriers struck the Pacific Fleet as it lay in port at Pearl Harbor, and—in the ensuing two attack waves—wrought devastation on the Battle Line and on air and military facilities defending Pearl Harbor. Onboard Arizona, the ship's air raid alarm went off about 07:55, and the ship went to general quarters soon thereafter. Shortly after 08:00, the ship was attacked by 10 Nakajima B5N "Kate" torpedo bombers, five each from the carriers Kaga and Hiryū. All of the B5Ns were carrying 410-millimeter (16.1 in) armor-piercing shells modified into 797-kilogram (1,760 lb) aircraft bombs. Flying at an estimated altitude of 3,000 meters (9,800 ft) Kaga's aircraft bombed from amidships to the ship's stern and were followed shortly afterwards by Hiryu's bombers which bombed the bow area.
The preliminary report, filed on 28 January 1942, on the damage suffered by Arizona during the attack listed seven bomb hits as well one torpedo hit on the port bow forward. This last hit was based on a report from the captain of the repair ship Vestal moored alongside and could not be verified at the time. One bomb was thought to have gone down the stack, but this was contradicted when the ship's superstructure was salvaged in 1942 and the cap of the funnel was intact. Later assessments show a total of four hits on the Arizona, plus three near misses. The near miss off the port bow is believed to have caused observers to believe that the ship had been torpedoed, although no torpedo damage has been found. The sternmost bomb ricocheted off the face of Turret IV and penetrated the deck to detonate in the captain's pantry, causing a small fire. The next forwardmost hit was near the port edge of the ship, abreast the mainmast, and probably detonated in the area of the anti-torpedo bulkhead. The next bomb struck near the port rear 5-inch AA gun.
The last bomb hit at 08:06 in the vicinity of Turret II, likely penetrating the armored deck near the ammunition magazines located in the forward section of the ship. While not enough of the ship is intact to judge the exact location, its effects are indisputable. About seven seconds after the hit, the forward magazines detonated in a cataclysmic explosion. It mostly vented through the sides of the ship and destroyed much of the interior structure of the forward part of the ship. This caused the forward turrets and conning tower to collapse downwards some 25–30 feet (7.6–9.1 m) and the foremast and funnel to collapse forward. The explosion took 1,177 lives of the 1,400 crewmen on board at the time, almost half of the lives lost during the attack. The explosion touched off fierce fires that burned for two days; debris showered down on Ford Island in the vicinity. Ironically, the blast from this explosion also put out fires on the repair ship Vestal, which was moored alongside.
Two competing theories have arisen about the cause of the explosion. The first is that that the bomb detonated in or near the black powder magazine used for the ship's saluting guns. This would have detonated first and then ignited the smokeless powder magazine which was used for the ship's main armament. A 1944 Navy Bureau of Ships report suggests that a hatch leading to the black powder magazine was left open, possibly with inflammable materials stocked nearby. The Naval History & Heritage Command explained that black powder might have been stockpiled outside of the armored magazine. This theory is attractive because black powder is easy to ignite and the relatively small amount of explosive filler in the bomb could have easily done so. The alternative explanation is that the bomb penetrated the armored decks and detonated directly inside one of the starboard magazines for the main armament. The problem is that smokeless powder is relatively insensitive to fire and the 14-inch powder bags actually required a black powder pad to ignite the powder. However, it seems unlikely that a definitive answer to this question will ever be found as the surviving physical evidence is insufficient to determine the cause of the magazine explosion.

Japanese credit for sinking

Credit for the hit was officially given to Petty Officer Noburu Kanai, who was considered to be the JNAF's "crack" bombardier; his pilot was Tadashi Kusumi.

Awards and recognition

Acts of heroism on the part of Arizona's officers and men were many, headed by those of Lieutenant Commander Samuel G. Fuqua, the ship's damage control officer, whose coolness in attempting to quell the fires and get survivors off the ship earned him the Medal of Honor.
Posthumous awards of the Medal of Honor also went to Rear Admiral Isaac C. Kidd, the first flag officer killed in the Pacific war, and to Captain Franklin Van Valkenburgh, who reached the bridge and was attempting to defend his ship when the bomb that hit the ammunition magazines destroyed her.

Thursday, January 23, 2014

1936A Narvik class Z-31 Zerstörer

Here are some more images of Dragon Models 1/350 scale type 1936A Narvik class Z-31 German Destroyer as it looked in 1944. Z-31 was taken by France after the war and renamed Marceau. It was scrapped in 1958.
This is one of the most detailed small scale ship models I have ever seen. It's quite an advancement over the models of yesteryear. This model is only 14 inches long and contains almost 600 parts and yet despite this high level of detail I still had to ad extra railing to make it more complete. I would recommend this kit only for advanced model builders.

From Wikipedia"
The Zerstörer 1936A-class destroyers, or Narvik-class destroyers as they were known to the Allies, were a class of German destroyers of the Second World War. In common with other German destroyers launched after the start of World War II, the Narviks were unnamed, known only by their hull numbers - Z23 to Z39.
In terms of armament, they were closer to light cruisers than the typical destroyer. The use of 15 cm (5.9 inch) guns was atypical of destroyers which tended to have guns around 120 - 127 mm (4.7 to 5 inch) in calibre. They were intended to carry two forward guns in a twin turret, but as the twin turrets were not ready in time, early class 1936As carried a single mounted gun forward.
Despite being powerful the ships were not without their flaws. There were problems with the reliability of the high pressure steam engines and seakeeping in rough seas due to the newly designed bow and heavy forward artillery.
The eight ships of the Zerstörer 1936A class (Z23 to Z30) were all laid down between 1938 and 1940. The seven destroyers numbered from Z31 to Z39 were classed as Zerstörer 1936A (Mob); they were laid down in 1940 and 1941 and were slightly larger and had some internal modifications (including engines that caused less trouble than with their predecessors) from the original design to shorten construction times.